
Are you ready to take your dessert game to the next level? Craving something utterly decadent and unforgettable? Look no further than Deep-Fried Cherry Filled Cheesecake! This isn’t your grandma’s cheesecake; it’s a deep-fried explosion of flavor and texture, combining creamy, tangy cheesecake with sweet cherry filling and a crispy, golden-brown coating.
You can also take a look at [Other Deep-Fried Desserts] for some options to use! This Deep-Fried Cherry Filled Cheesecake is surprisingly easy to make at home and will be the star of any party or special occasion. So, get ready to unleash your inner chef and discover the magic of this ultimate indulgent treat! Be the star of the dessert and bring this amazing Deep-Fried Cherry Filled Cheesecake dish for the party. This Deep-Fried Cherry Filled Cheesecake will become a new family favorite!
Assembling Your Arsenal: Ingredients for Deep-Fried Cherry Filled Cheesecake Bliss
The key to extraordinary Deep-Fried Cherry Filled Cheesecake is in the quality and balance of the ingredients. Here’s a detailed list to help you prepare: If you want to dive into the nutrition, be sure to check out the USDA’s nutritional information [USDA Nutrition Facts].

For the Irresistible Cheesecake Filling:
Cream Cheese: 32 ounces (4 packages, 8 ounces each), full-fat, softened to room temperature. It ensures that all the Deep-Fried Cherry Filled Cheesecake contains a rich flavour. The quality of the ingredient will give all the taste.
Granulated Sugar: 1 cup. Sweetness is just as important, this allows you to control the sweet level for your preference.
Large Eggs: 3, at room temperature. Eggs are the binder for everything in the recipe.
Sour Cream: 1/2 cup, full-fat, at room temperature. With a quality brand, the sour cream provides great flavor.
Vanilla Extract: 1 teaspoon. It is often a must have with sweets, allowing you to further the flavor.
Lemon Juice: 1 tablespoon, fresh. With fresh lemon juice, this allows you to get a new taste.
For the Sweet & Tangy Cherry Filling:
Cherry Pie Filling: 1 (21-ounce) can, or homemade cherry filling. You want to consider the flavor with the cherry pie filling.
Cornstarch: 1 tablespoon (only if using homemade cherry filling, to thicken). Cornstarch helps add thickness to the filling when you prepare your Deep-Fried Cherry Filled Cheesecake.
For the Crispy Coating and Frying Process:
Graham Crackers: 1 1/2 cups, finely crushed (about 12 full sheets). The graham crackers help with the texture of the dish, also providing a nice flavour component that is unique.
All-Purpose Flour: 1/2 cup. It is the base that keeps the entire recipe together.
Large Eggs: 2, lightly beaten. Adds moisture that is needed and important.
Vegetable Oil: For deep-frying, enough to fill your pot or deep fryer (about 6-8 cups). You will want to ensure the oil is filled properly for the deep frying component.
Powdered Sugar: For dusting, optional. To give a sweet touch to the dish.
A Step-by-Step Symphony: Creating Your Deep-Fried Cherry Filled Cheesecake
Creating this Deep-Fried Cherry Filled Cheesecake masterpiece requires precision and care. Follow these steps carefully:

Part 1: Crafting the Cheesecake Filling:
Cream Cheese and Sugar Fusion: In a large mixing bowl, beat the softened cream cheese with an electric mixer on medium speed until smooth and creamy. Gradually add the granulated sugar and continue beating until well combined and fluffy. Be sure to scrape down the sides of the bowl occasionally. With patience, you can make the perfect cheesecake.
Egg Incorporation: Add the eggs one at a time, beating well after each addition. Be careful not to overmix.
Final Touches: Stir in the sour cream, vanilla extract, and lemon juice until just combined. Do not overmix. For the perfect Deep-Fried Cherry Filled Cheesecake, it is important to follow all these steps.
Part 2: Crafting the Cherry Filling (if not using canned):
Combine Cherry Ingredients: In a saucepan, combine pitted cherries (fresh or frozen), sugar, lemon juice, and cornstarch (if using). With a balance, you can make all the delicious flavors.
Cooking Cherry Filling: Cook over medium heat, stirring constantly, until the mixture comes to a boil and thickens. Remove from heat and let cool completely. The heat helps fuse all of the flavours together.
Part 3: Assembling the Mini Cheesecakes:
Portion Out: Line a baking sheet with parchment paper. Using a large cookie scoop or spoon, portion the cheesecake filling into roughly 1/4 cup mounds on the parchment paper. You should get about 12-16 mounds. It is important to have equal portions for the perfect flavors and even distribution.
Well Creation: Gently press your thumb or a spoon into the center of each cheesecake mound to create a well. Without the well, there is nowhere for all the cherry filling to be.
Cherry Infusion: Fill each well with about 1-2 teaspoons of cherry pie filling.
The Deep Freeze: Place the baking sheet in the freezer and freeze for at least 4 hours, or preferably overnight. This is crucial! This allows you to not melt all the dish. You need to have the item freezed for at least 4 hours to make the Deep-Fried Cherry Filled Cheesecake.
Part 4: Coating and Deep-Frying:
Coating Station Setup: Set up three shallow dishes. In the first dish, place the all-purpose flour. In the second dish, add the lightly beaten eggs. In the third dish, place the crushed graham crackers.
Delicate Coating: Remove the frozen cheesecakes from the freezer. Working quickly, gently roll each cheesecake mound in the flour, then dip it into the beaten eggs, and finally coat it thoroughly with the crushed graham crackers. Make sure the entire cheesecake is covered in the crust. This will help keep all the texture inside.
Oil Heating: In a deep pot or deep fryer, heat the vegetable oil to 350°F (175°C). Use a thermometer to monitor the oil temperature. It is important to keep track of the thermometer, so you don’t cause a burn.
Deep-Frying Process: Carefully drop 2-3 coated cheesecakes into the hot oil at a time, being careful not to overcrowd the pot. Fry for 1-2 minutes per side, or until golden brown and crispy. Fry for less than 2 minutes to ensure the food doesn’t burn.
Drain and Rest: Remove the deep-fried cheesecakes from the oil using a slotted spoon or tongs and place them on a plate lined with paper towels to drain any excess oil. Removing all the oil can save some calories!
Sugary Dusting (Optional): While the cheesecakes are still warm, dust them with powdered sugar, if desired. It is very important to let it cool.
Immediate Gratification: Serve the Deep-Fried Cherry Filled Cheesecake immediately while they are warm and crispy. The best way to serve this dish is while it is hot!
Pro Insights: Tips for Deep-Fried Cherry Filled Cheesecake Success
Mastering Deep-Fried Cherry Filled Cheesecake requires attention to detail and these pro tips:
The Deep Freeze is a Must: Ensuring that you give it the deep freeze for about 4 hours is key!
Speed and Precision: Ensure you quickly work on the steps, or it may melt.
Oil Temperature Control: If you make the oil too hot, it may cause burns!
Don’t Overload: Avoid overcrowding, as this causes extra oil to be.
Choose Quality Oil: Pick the best oil that has no strong odor.
Drain the Excess: Ensure you drain all the oil before serving.
Serve Freshly Prepared: Enjoy while it is still crispy for the best flavour.
The Art of Preservation: Storage for Your Deep-Fried Cherry Filled Cheesecake
Preserving Deep-Fried Cherry Filled Cheesecake is challenging due to its nature. However, if you must:
Eat Right Away: The best tip to eating this dish is to do it as soon as you prepare it!
Quick and Fast Refrigeration: If you can, store it fast after you prepare it.
Unfortunately, it is not recommended to store and freeze. This could impact the flavours and make it less edible.
Variation Exploration: Reinventing Deep-Fried Cherry Filled Cheesecake
Elevate your Deep-Fried Cherry Filled Cheesecake with these creative variations:
Fruit Swaps: Feel free to change the filling and use a variety of different flavors.
Choco Infusion: Add some chocolate to the dish.
Nutella Swirl: Swirl some Nutella and change the flavor component of the dish.
Peanut Blast: Add peanut butter to the dish for a peanut taste.
Cookie Crumble Delight: Use different crumbs from oreo to chocolate chips.
Sugar Boost: Increase or reduce the amount of sugar, it is all a part of experimenting.
Mix It Up: Mix new flavours, add them and see if they are good.

Plating Perfection: Serving Suggestions for Irresistible Deep-Fried Cherry Filled Cheesecake
Make sure you enjoy and experience every single flavour. Here are some suggestions to making your Deep-Fried Cherry Filled Cheesecake perfect:
Ice cream on top: Have a great taste with some ice cream.
Mix with Coffee: Try it with coffee or some other types of warm drink.
Perfect Party Platter: Create a platter for all the occasions to wow all of the members.
Sauce Garnish: Have a Carmel drizzle.
Mint leaf addition: A bit of green for the plate!
Unlocking Insights: FAQs about Deep-Fried Cherry Filled Cheesecake
Q: Can low-fat cheese be used?
A: It is not recommended
Q: What to do if I don’t have fruit?
A: Ensure you use high quality ingredients for best taste
Q: What to use instead of a pot?
A: Deep frying is preferred
Conclusion: A Deep-Fried Cherry Filled Cheesecake Triumph
Deep-Fried Cherry Filled Cheesecake is not just a recipe; it’s an experience. Its unique flavor combinations makes it a must-have for any dessert enthusiast. When you know the tips and tricks, this recipe gives you the best result. With a deep-fried dish it is difficult to prepare! So, you have now had a good taste of all the dishes, you can now start to deep fry with ease. When you are looking for a dish to enjoy, look no further. This Deep-Fried Cherry Filled Cheesecake is here to stay for the ages! Make sure that you wow every single person.
This Deep-Fried Cherry Filled Cheesecake is worth it.
Deep-Fried Cherry Filled Cheesecake

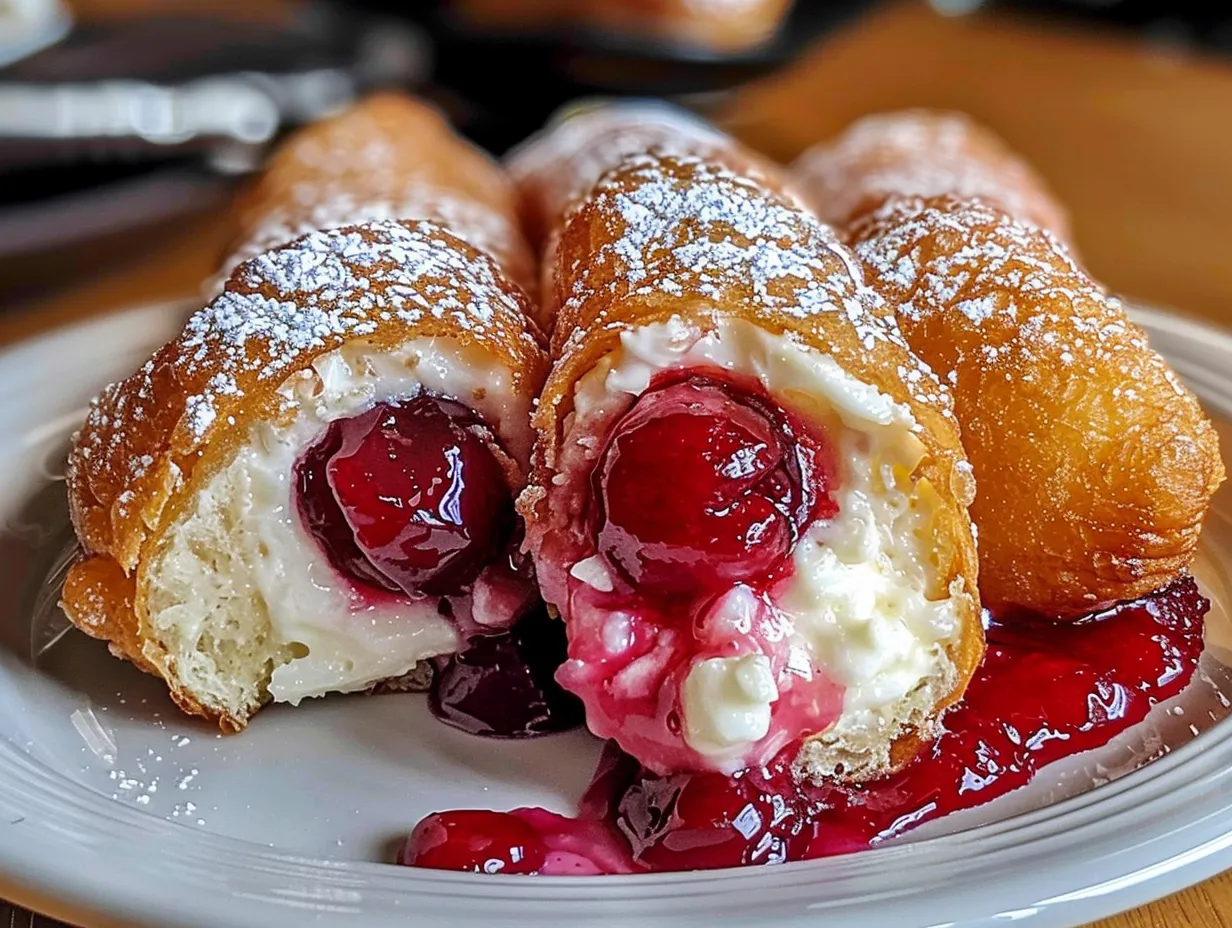
A crispy, golden-brown deep-fried cheesecake filled with sweet and tangy cherry filling, creating the ultimate indulgent dessert.
- Prep Time: 15 minutes
- Cook Time: 5 minutes
- Total Time: 20 minutes (plus freezing time)
- Yield: 12-16 pieces
- Category: Dessert
- Method: Deep-Fried
- Cuisine: American
Ingredients
- 32 ounces cream cheese (4 packages, 8 ounces each), full-fat, softened
- 1 cup granulated sugar
- 3 large eggs, at room temperature
- 1/2 cup sour cream, full-fat
- 1 teaspoon vanilla extract
- 1 tablespoon fresh lemon juice
- 1 (21-ounce) can cherry pie filling (or homemade)
- 1 tablespoon cornstarch (only if using homemade filling)
- 1 1/2 cups finely crushed graham crackers (about 12 full sheets)
- 1/2 cup all-purpose flour
- 2 large eggs, lightly beaten
- Vegetable oil for deep-frying (6-8 cups)
- Powdered sugar for dusting (optional)
Instructions
- In a large mixing bowl, beat the softened cream cheese until smooth. Gradually add granulated sugar and beat until fluffy.
- Add eggs one at a time, beating well after each addition.
- Stir in sour cream, vanilla extract, and lemon juice until just combined.
- Line a baking sheet with parchment paper. Scoop 1/4 cup portions of cheesecake mixture onto the sheet, forming mounds.
- Press a well into each mound and fill with 1-2 teaspoons of cherry pie filling.
- Freeze for at least 4 hours or overnight.
- Set up three shallow dishes: one with flour, one with beaten eggs, and one with crushed graham crackers.
- Coat each frozen cheesecake mound in flour, then eggs, then graham crackers.
- Heat vegetable oil to 350°F (175°C) in a deep fryer or pot.
- Fry 2-3 cheesecakes at a time for 1-2 minutes per side, until golden brown.
- Remove and drain on paper towels.
- Dust with powdered sugar if desired and serve immediately.
Notes
For best results, freeze cheesecake mounds overnight before frying. Serve immediately for the crispiest texture.